Young Elf, Part I
In December, elves exchange handmade cards. I want to draw a young elf and I asked my youngest brother to be the model for this portrait!
I am going to split this portrait into two tips. This first tip will be about how to do the line drawing of a portrait, and the second tip will be about how to do the shading.
First, you might want to read Scoble’s tip about where features actually go on a face. Humans and elves have very similar features, so you can use this human face as your basic guide: Where-Things-Actually-Go-On-A-Face. For tools, I suggest a 2B or 3B pencil, and eraser #4 in the eraser tip. If you missed the tips on pencils and erasers, here they are!
The pencil is a mighty tool! The-Pencil-Is-A-Mighty-Tool
Erasers and the art of erasing. Erasers-And-The-Art-Of-Erasing
Portraits require a little bit of preparation, as you can see.
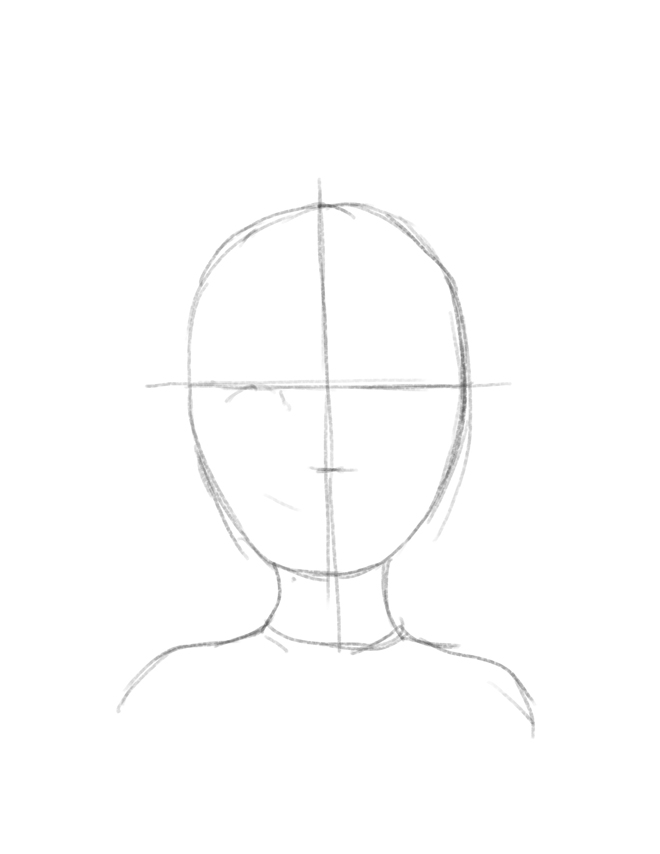
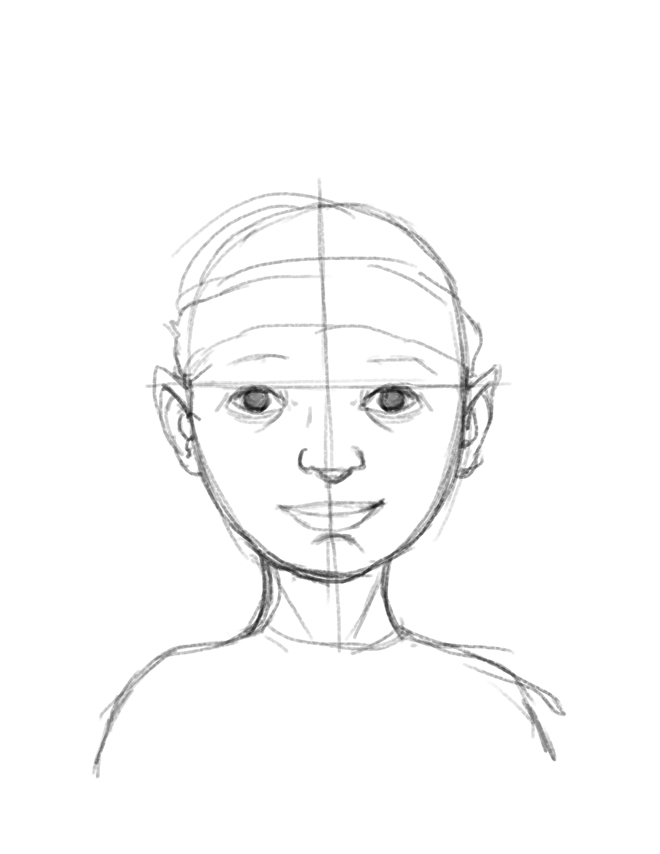
Step 1: Now that we know where the different facial features go, and we have our tools ready, we can start out by drawing a cross with a very light hand because we will need to erase it later! Be mindful of how hard you are pressing with the pencil until you reach Step 4. Do your best to keep your lines light so that you can erase easily.
Next we draw an egg shape for the head, and then the lines for the neck and shoulders. Sometimes you have to redraw this egg shape several times before you feel comfortable with it. That’s OK!
Step 2: Next, and following the advice from Scoble’s tip, we draw in the features. First, the eyes and eyebrows, then nose, then lips and, lastly, a line across the forehead for where the elf hat will eventually be.
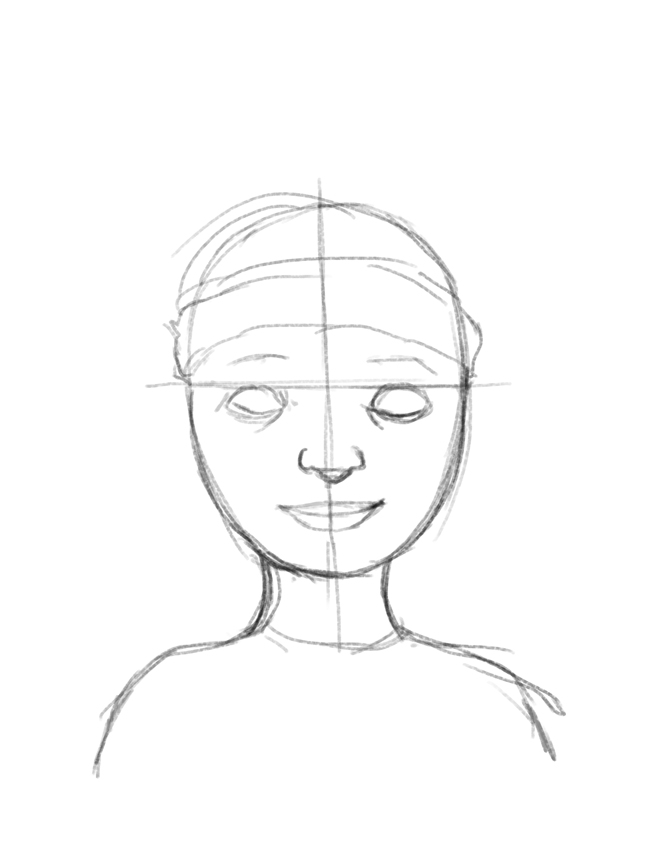
Step 3: Now we draw the pupils of the eyes, then the ears and lastly a curved line for the chin. If you have trouble with getting the features right, just look carefully at the drawings here and mimic what I have drawn. Illustrator elves do lots of versions of their drawings. Often, the first several are truly just practice. So, try not to get frustrated or discouraged. This is how we improve, through practice.
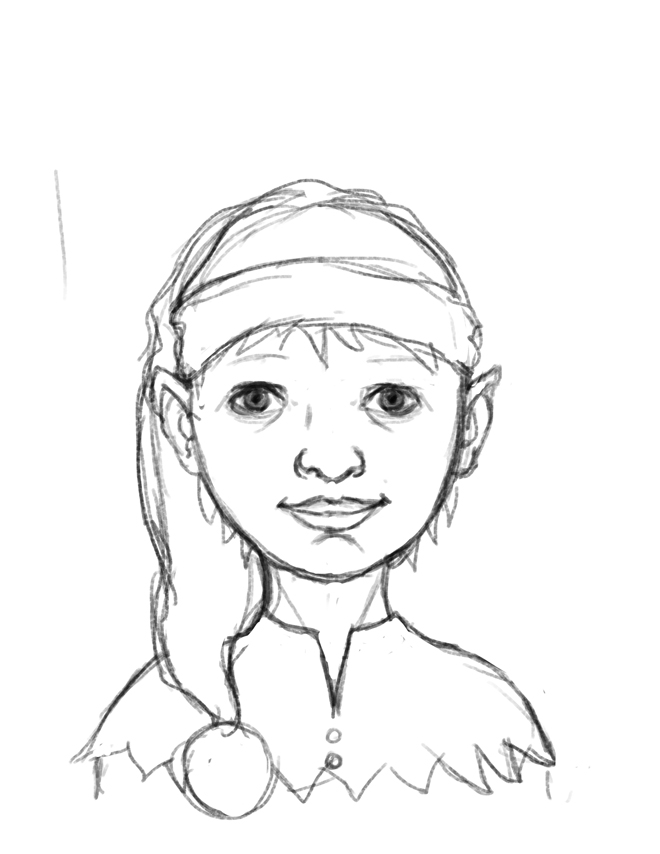
Step 4: Now we are going to draw the elf hat! We give it some length down the shoulder and a big puffy ball at the end. Then, we add some suggestion of hair where the hat fits over the forehead.
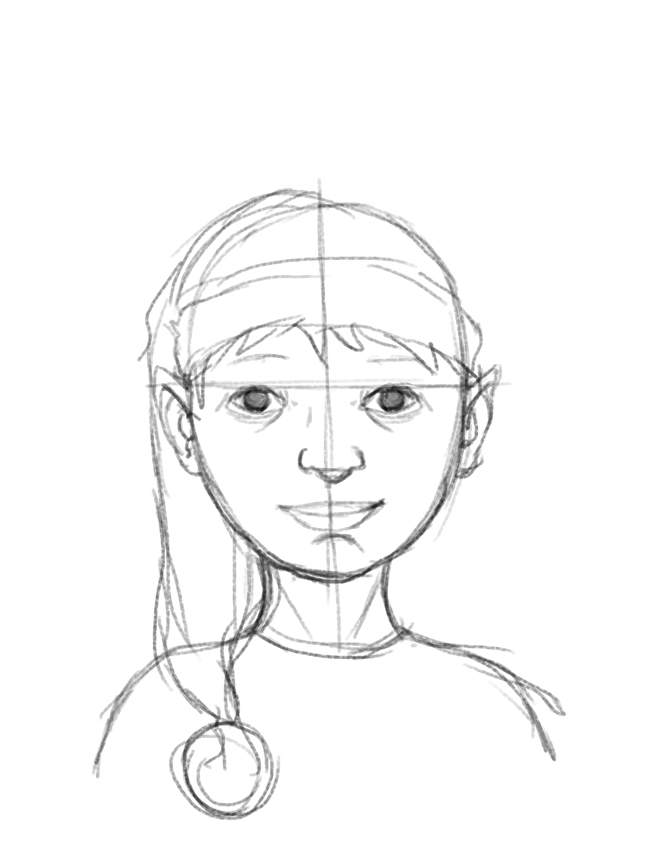
Step 5: Now we need to add in his clothes. (It is not a good time of year to be without clothes.) Draw some loose zig-zags across the bottom part of the shoulders and make a collar around his neck. You can also add some buttons.
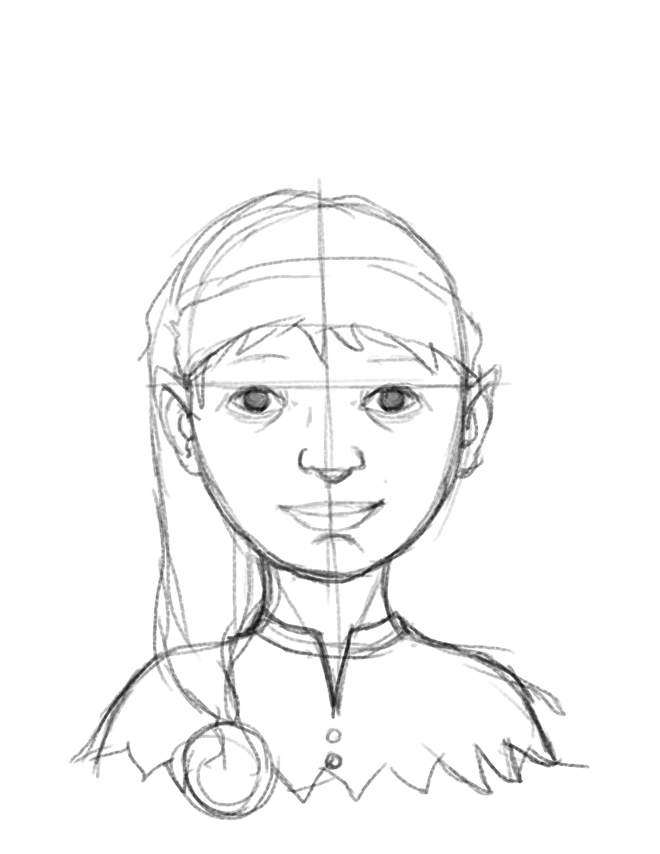
Step 6: Find your eraser and erase all of the extra lines that you no longer need. The cross you began with can come out of the drawing. At this point, look to tighten up your drawing with darker lines all around. Voila! We have a young elf for a card.
You can color this in or work with the next tip, which will be all about shading…